
Whenever I asked for a toy as a child, my parents would often reply: "You want it? Let's make it!" Rather than purchasing the things I wanted, they would take me shopping for all the necessary tools and materials, then provide the guidance I needed to recreate the items I desired.
This was my mom and dad's way of spending quality time with me. They challenged my creativity and instilled a value of resourcefulness. I am grateful for these lessons because they've allowed me to discover the joy of working with my hands. It has become one of my deepest passions, and it influences everything I do today.
When I came across this vintage book iPhone dock at Anthropologie, the first thought that popped into my head was, "Oh neat! I want that." The second thought that came to mind was, "You know what? I could make that." This turned out to be such a fun and simple project, and I am very happy to share it with you!
Here's what you will need:
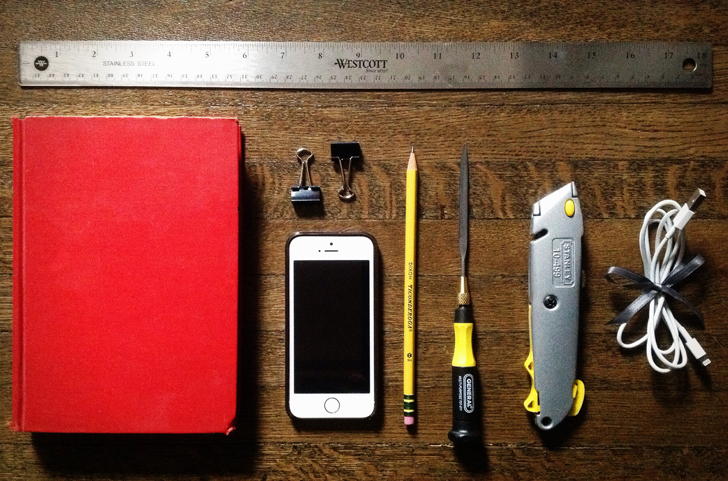
- Hardcover book of your choice (At least 1.5" thick)
- Ruler
- Pencil
- 2 binder clips
- Box cutter
- Thin metal file
- Phone & charger cable

Choose any hardcover book you'd like to turn into a dock. Sentimental attachment made me queasy about chopping up my own beloved books, so I swung by the Strand Book Store and picked up this 1943 edition of A Tree Grows in Brooklyn for a dollar. By the way, if you have not been to this bookstore, you really must stop by. And if you have not read this book, add that to your to-do list as well.
Make sure you are not cutting up a rare collector's edition, and we are ready to start!
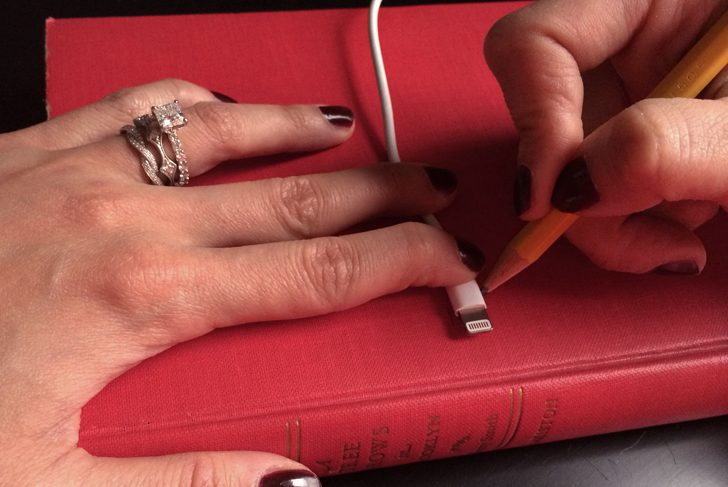
Begin by outlining the width and diameter of your charger with a sharp pencil. Be sure to trace as closely as possible.
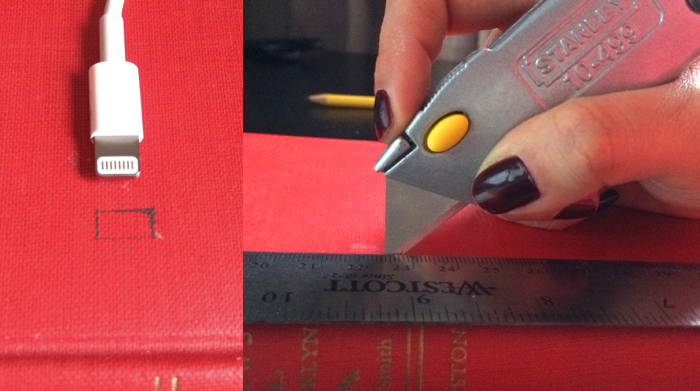
You know the saying - Measure twice, cut once. We do not want to waste any books on this project! Once you are certain that the outline is as close to the actual size of the base as possible, begin carefully cutting into the cover. Use a ruler as a guide to keep your lines straight. Rather than stabbing into the cover, I found that light, repetitive strokes were the most effective way to cut and maintain precision.
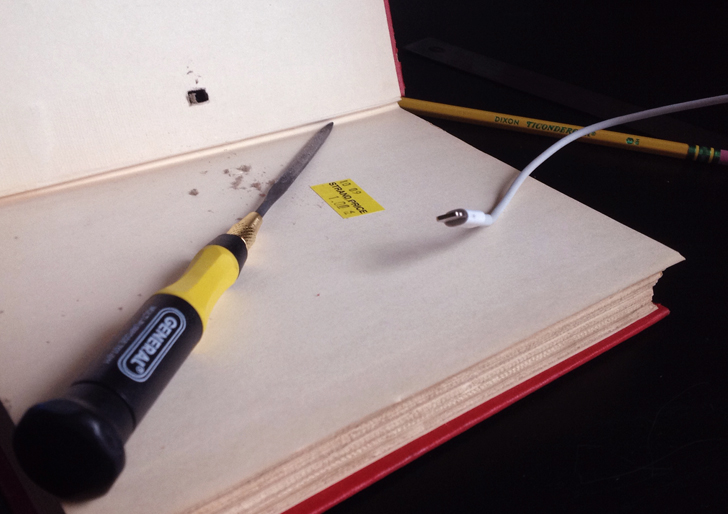 Once you break through the hard cover, try squeezing your charger through the opening. Use a thin metal file to fine tune any areas that need adjusting. File a little at a time and constantly check the fit. You want to achieve a very tight fit in order to create a base that will support your phone in a vertical position.
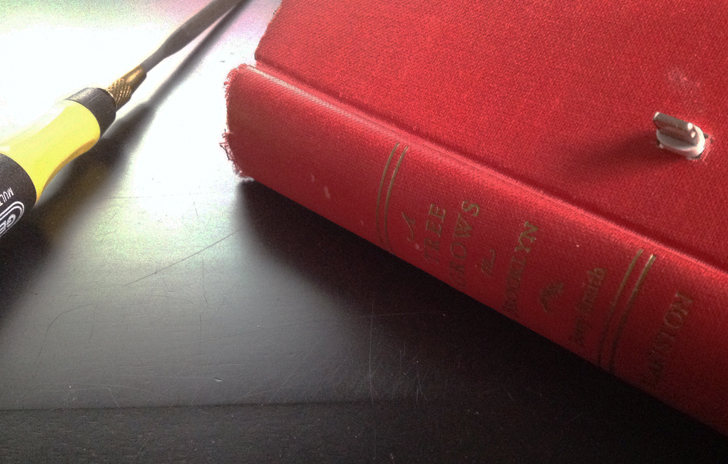
Eventually, you should be able to wedge your charger through the opening.
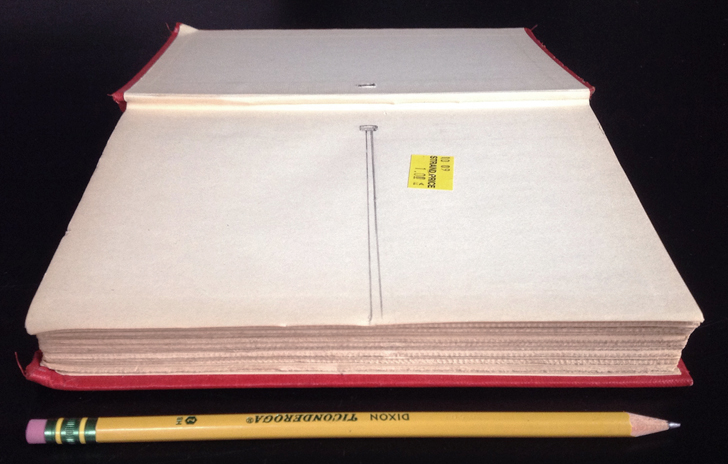
Trace through the opening in the cover to get an outline onto the first inside page. Then, using your ruler, draw a channel to accommodate the charger's cord.
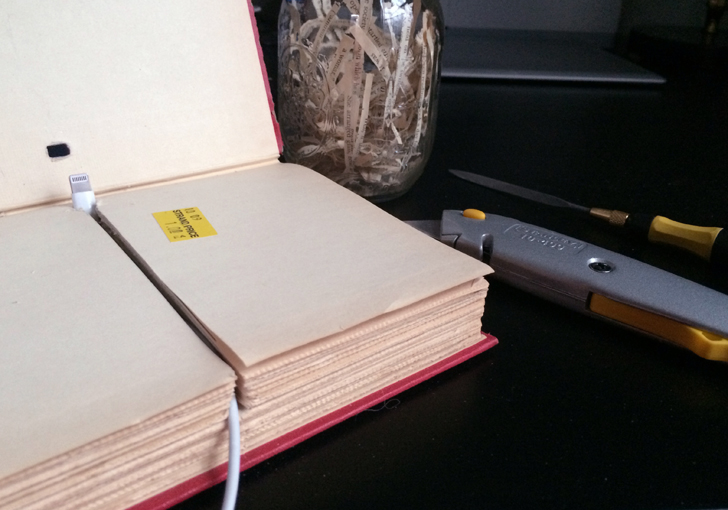
Use your box cutter and ruler to cut along the outline. This is where the binder clips come in handy - use them to keep the finished pages clipped back as you continue to cut through the book. After you have cut approximately 100 pages, try pushing the charger base into the cutout. Keep testing periodically to ensure that you are not cutting too deeply into the book.
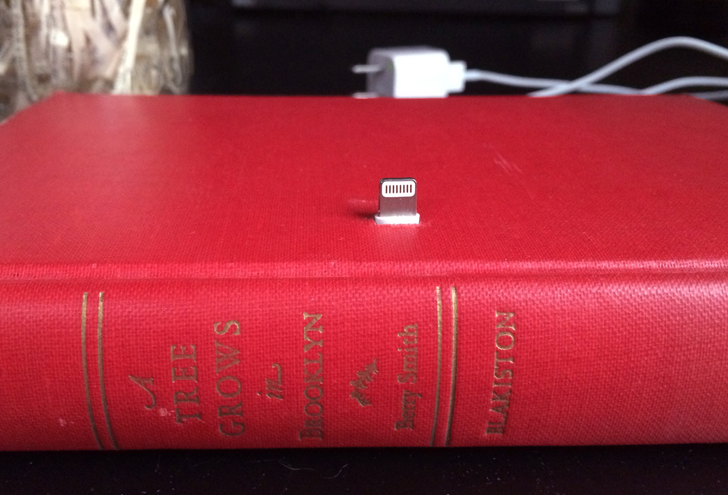
Once you are able to fit the base snugly into the pages and the charger sits flush with the cover, you are all done!
 I usually charge my phone on my night stand at the end of each day. There's always a stack of nighttime reading at my bedside, so the new dock fits right in! I love that you can always swap out the surrounding books to create different looks.
 Prior to this project, I'd been clipping my charger to a pillow so that it would not fall behind our bed every time I unplugged my phone. Having a place to dock my phone is much more convenient, especially since I use it as my alarm clock. No more dropping my phone on the floor every time I hit snooze!
 I hope you enjoyed this project! It's a cinch to adapt and personalize, and would make a fantastic gift for that lovely bibliophile on your list :)