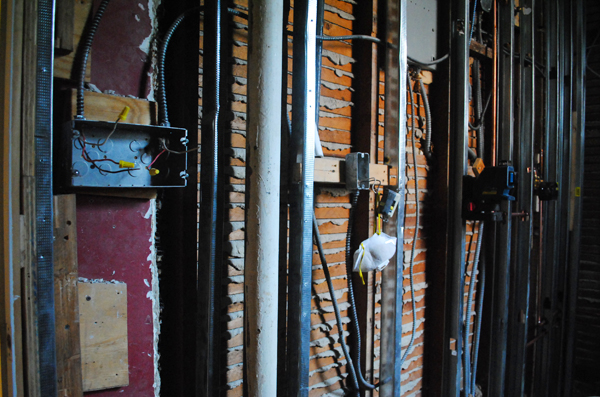
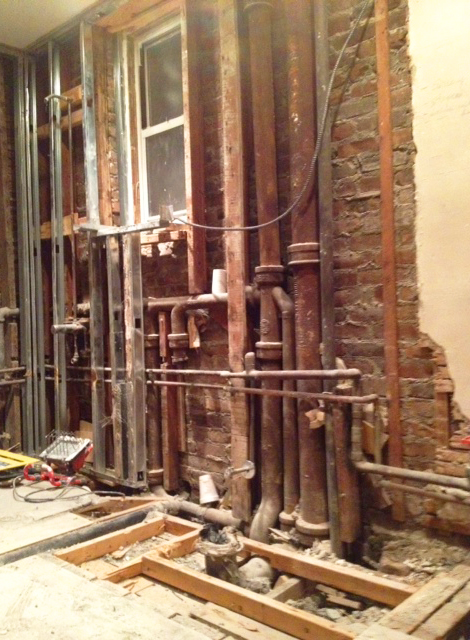
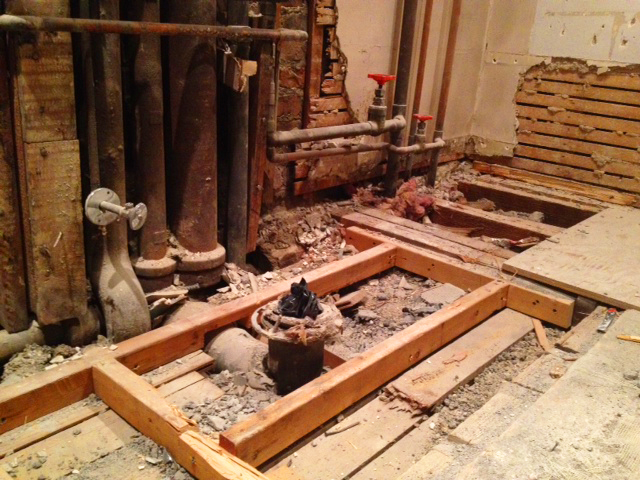
Thursday
Jun202013

Clean Slate


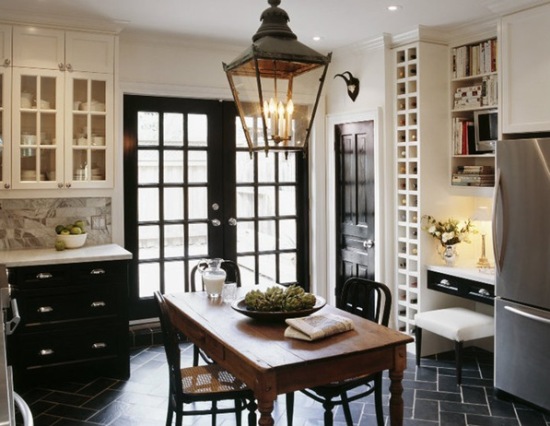
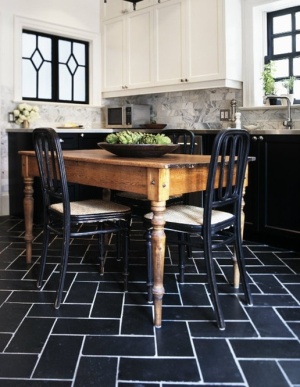
I have been smitten with Tommy Smythe's kitchen ever since the moment I first laid eyes on it. Carrara backsplash, dual-tone Shaker cabs, French doors, antique paned windows, and don't even get me started on that oversized lantern. And THOSE FLOORS. I instantly fell for them and knew right then and there that we just had to have herringbone slate floors in our new home. Well, guess what! Our bathroom demo was my golden opportunity to make it happen :)

Although slate is extremely durable and low-maintenance, it is still a porous stone and not the best choice for a walk-in shower. Since I wanted to keep the flooring consistent throughout the entire room, I opted for the next best thing - Porcelain tiles from Italy that really look and feel like the real deal!

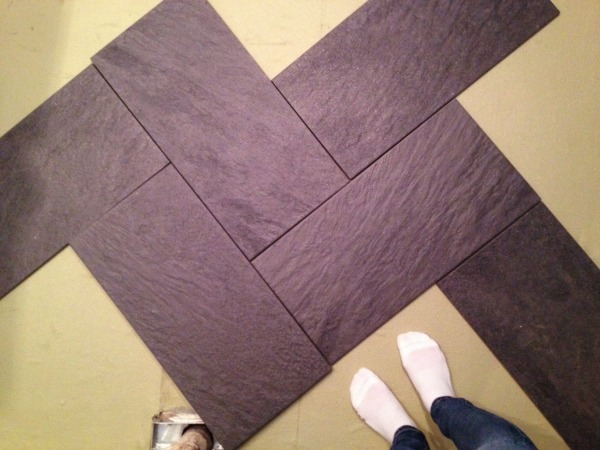
Herringbone is a busy pattern that takes up a lot of visual space. Working with larger dimensions keeps the pattern bold but subtle, and actually makes a room appear bigger! These 12x24" tiles provide tons of surface area that will be easy to maintain and keep clean.

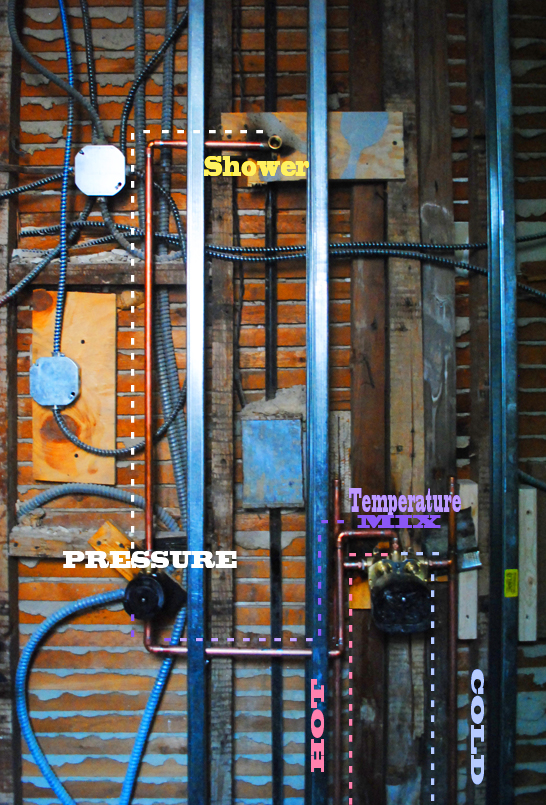
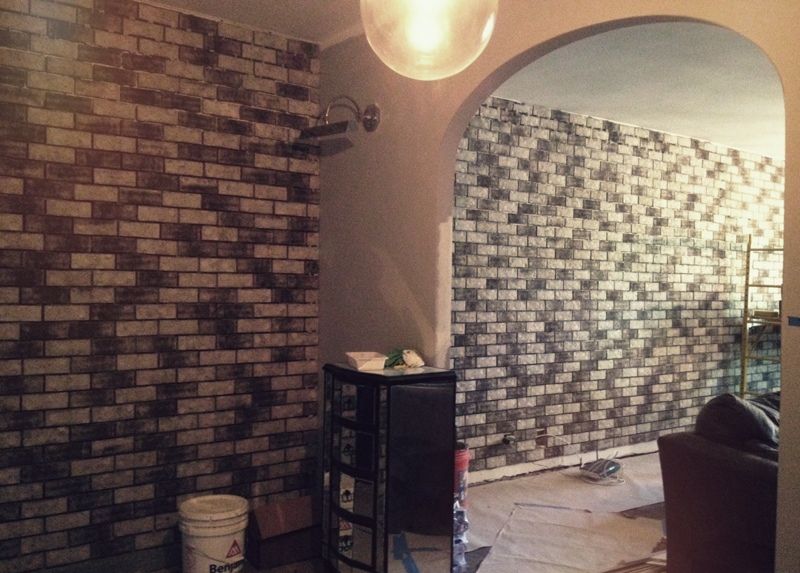
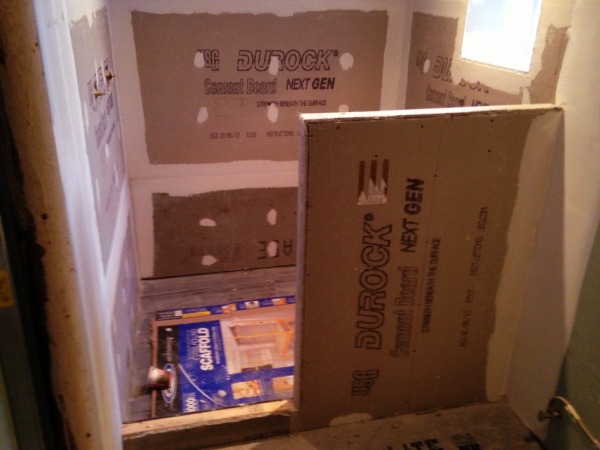
We installed a pony wall to separate the shower area from the rest of the room.

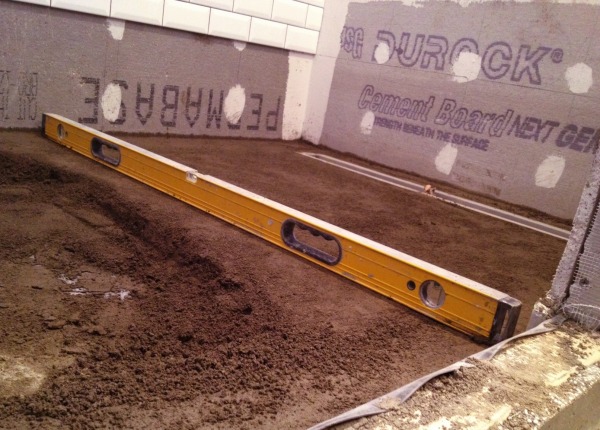
Once the entire room had been triple-waterproofed, the shower's interior was pitched at an angle towards the drain.

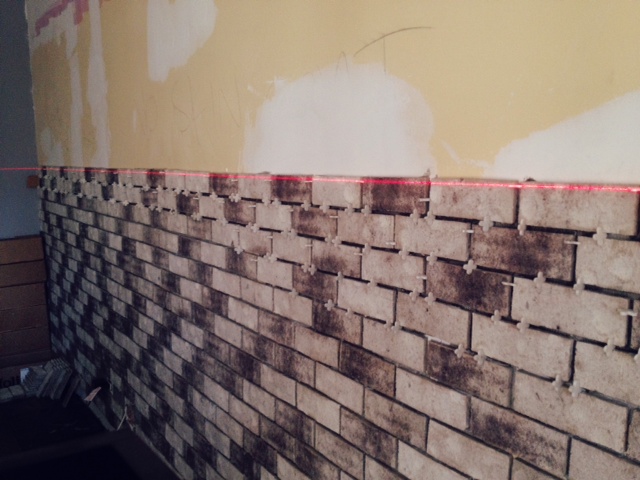
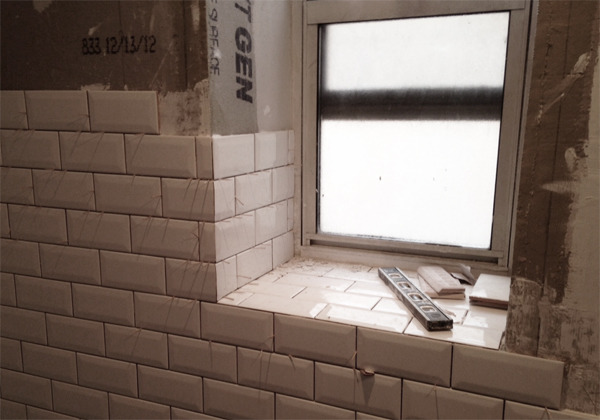
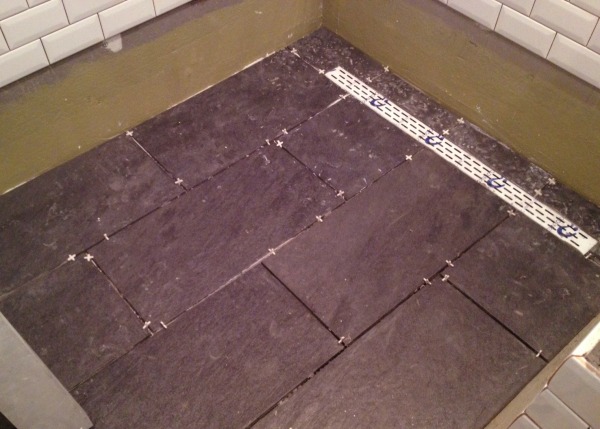
Tiles were then installed in a subway pattern in order to allow water to flow smoothly toward the infinity drain.

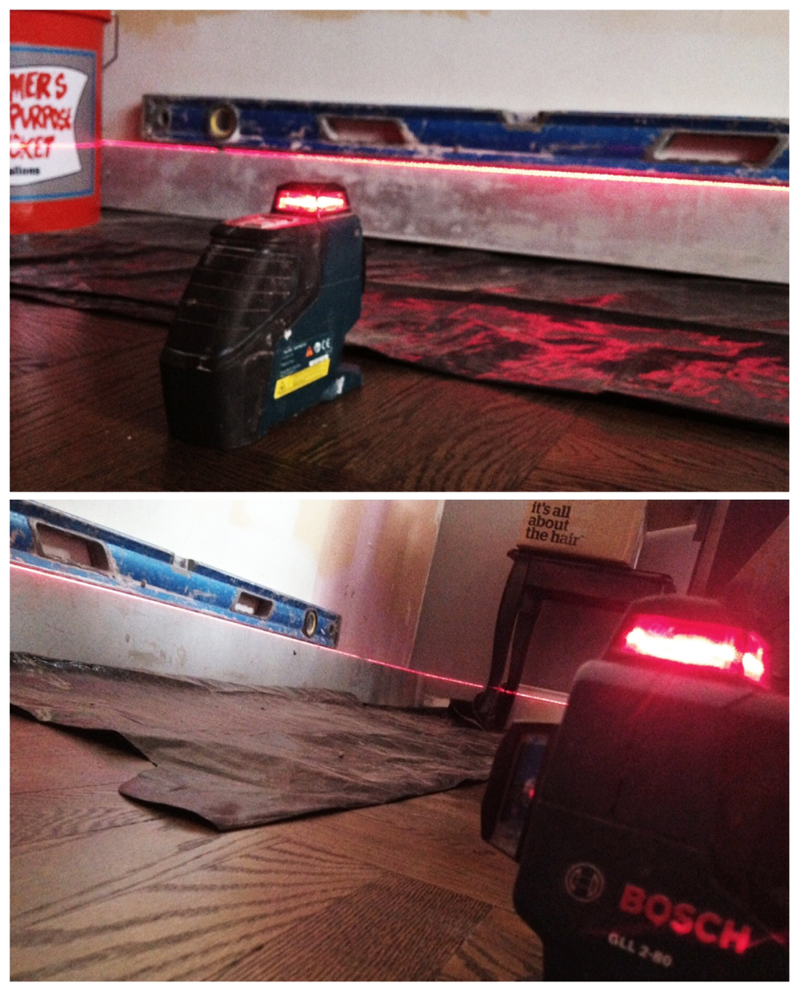
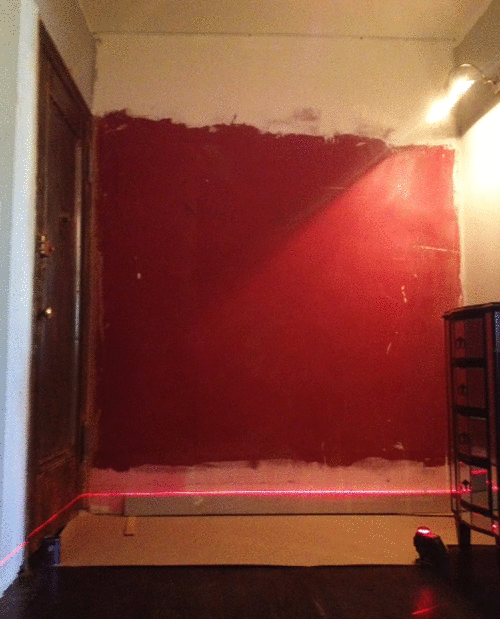
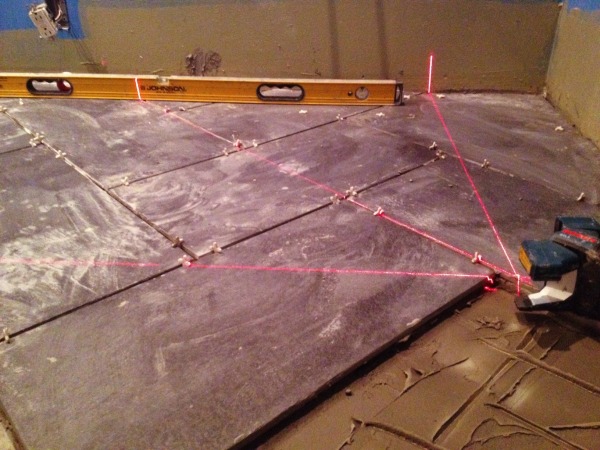
The gorgeous herringbone pattern will run throught the rest of the room. There goes that laser again!


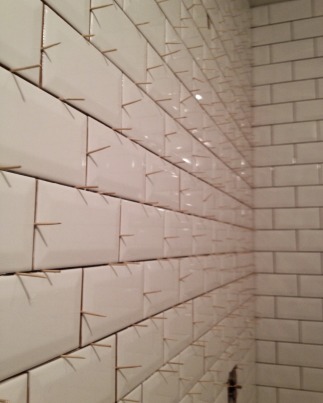
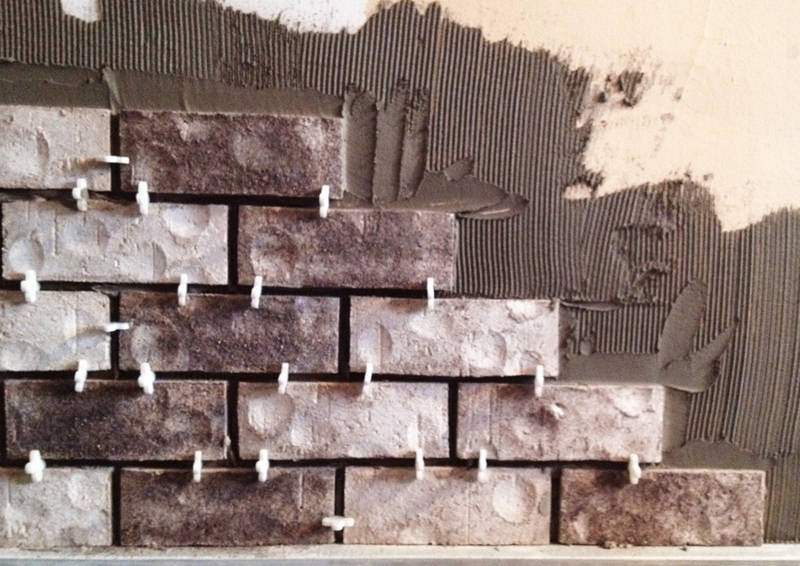
I chose beveled subway tiles for the walls. The way their smooth facets sparkle against the rugged texture of the floors makes my heart sing ooh-la-la.

Almost there! I cannot wait to share the finished room with you. Stay tuned :)

Monday
Jun102013

Piping Up

Once I had all the required licenses, work orders, and permits squared away, our team had a field day gutting our bathroom down to the studs! It was absolutely thrilling to see the walls come down and the floors come up to create a blank canvas for my own personal vision:

BEFORE: The square footage in our bathroom is very generous as far as New York apartments go. However, the space felt cramped and unbalanced, as though everything had been shoved to the left side of the room. Look at all that unused dead space on the right! The window was also awkwardly positioned and straddled the Jacuzzi/shower. This really, really bugged me, and I've spent many sleepless nights trying to come up with a viable solution for this aesthetic dilemma. I know, you don't want my problems. (Before photos here)

AFTER: I designed the layout to spread across the entire space. In my new floor plan, the sink is relocated over and across to the other side of the room, and the Jacuzzi is GONE! Opening up this area allowed me to add a large walk-in shower in lieu of a tub. I don't know about you, but I prefer steamy, hot showers over pruning up in a tub of soapy suds. Notice how the window now lives happily inside the shower walls! Hooray! Not only does this reconfigured layout provide a smoother flow of balance, but the entire space just feels a lot more functional and spacious.

We opened up the floor to re-route the sink plumbing across the room.

The toilet did not move, but the original round-bowl model was removed to be replaced with one with an elongated bowl. Elongated bowls are a little bit more guy-friendly, if you get my drift!

The shower pipes were also re-routed across the room so that the fixtures could sit perfectly centered in the stall. This was done purely for aesthetic reasons, but trust me, it makes total sense in the big picture. We installed thermostatic and volume control valves, which I am incredibly excited about. So gangsta.

As you can see, moving plumbing fixtures is no easy feat. I initially booed and hissed my way through all the DOB paperwork and fees, writing it all off as one big expensive, time-consuming nuisance. However, after seeing all the technical aspects involved in this project, I am so thankful we took the necessary steps to do everything the legit and legal way.

Anyway, now that all the nitty gritty details are done and over with, we can start making things pretty :) More later!

Wednesday
May152013

Mortar Kombat

Guess what, guys! I am FINALLY done with my brick wall project. Yippee! Hooray! Whew.

Once the mortar was mixed and the bricks had been laid out, I experienced a major "Oh-crap-what-have-I-gotten-myself-into" moment. I honestly felt that I'd bitten off more than I could chew. But everything was all set and ready to go, and those naked, patched-up walls were seriously starting to make my eyes bleed. So there was no turning back. It was time to get down and dirty.

It's been a grueling, dusty, and extremely rewarding month. Here's the recap of my first foray into masonry:


Recognize this awesome laser? A perfectly level foundation is the key to a straight wall, so I used this handy tool to guarantee that my bolsters were 100% straight prior to laying the first brick.

Next, I combined powdered thinset mortar with water and mixed it into a thick, batter-like consistency. The boxes of veneers came in mixed assortments of grays and browns, so I organized all the bricks by color in order to plan out an even distribution of all the variations.


This technique is called back-buttering, and it really is like spreading peanut butter onto a piece of toast! I found that an even 2/3" layer was enough to grip the wall without oozing everywhere.

After back-buttering, I pushed and wiggled each tile against the wall until the mortar started pulling at the brick. Once the suction was created, I slowly slid the brick up and over, using spacers to maintain even distancing between each brick. I went with 3/8" spacers, which is the standard joint spacing for real brick walls.


------------ Repeat for 280 square feet. ------------

It took me about two days to get a hang of the fundamental techniques and stop making huge messes everywhere. After that, I started throwing bricks on the wall like nobody's business. This project didn't call for any extraordinary skills, but it did require an insane amount of tedious repetition and grunt work. I can't even complain, because all that squatting, lifting, bending, and reaching totally whipped me into shape ;-)

I also tackled a smaller wall by our entryway in order to establish a smooth, transitional flow into the living room. The previous owners were obviously really into the color red. I think it made them happy. Kinda like how Wonka makes me happy.

Mid-point laser check! Yup, still straight :)

Almost there!! Chris and I signed the back of the final brick before it was set into place, and...

Bam! All done.

This project was a true labor of love. Sure, I've been sporting a set of calloused man hands for about a month, and I also dropped/broke a brick on my foot, rendering myself incapable of wearing any cute shoes for the next few weeks. But the wall is finally complete, and I am deliriously happy with the outcome.

Once the crown and base mouldings are installed, our living room renovation will be finished! We are sooo close, and I absolutely cannot wait to share the final transformation with you. Stay tuned!