Wednesday
May282014

Ready for Departure

Chris and I are packing our bags and fleeing town this evening! We will be flying off to Venice and spending two days there prior to setting sail for a week around the Greek Isles. This will be my first time on a cruise, and I am beyond excited! Work and life have been pretty much non-stop crazy lately, and I am so thankful for this chance to get away for a little while and catch my breath. I have a feeling this is going to be a very special trip.

In the midst of planning and packing, I decided to make some holders for our passports! I found a great tutorial on Poppytalk, and took things just a step further by stamping some special words on the front. The covers were really fun and a snap to make, so I thought I'd leave you guys with this simple little project.


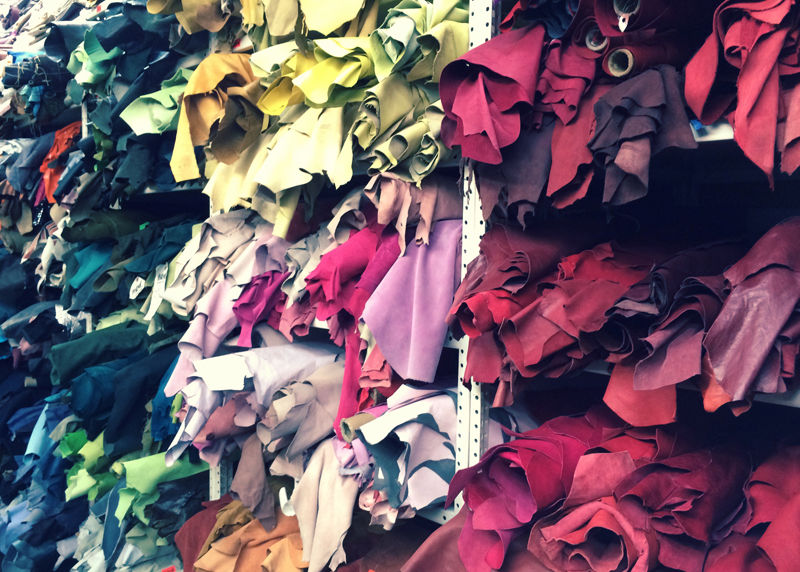
This was my first experiment with leatherworking, and I learned quite a lot. I visited a bunch of leather stores around the Fashion District, and they all smelled amazing! It was quite an experience to see and feel the difference between all the various animal skins.


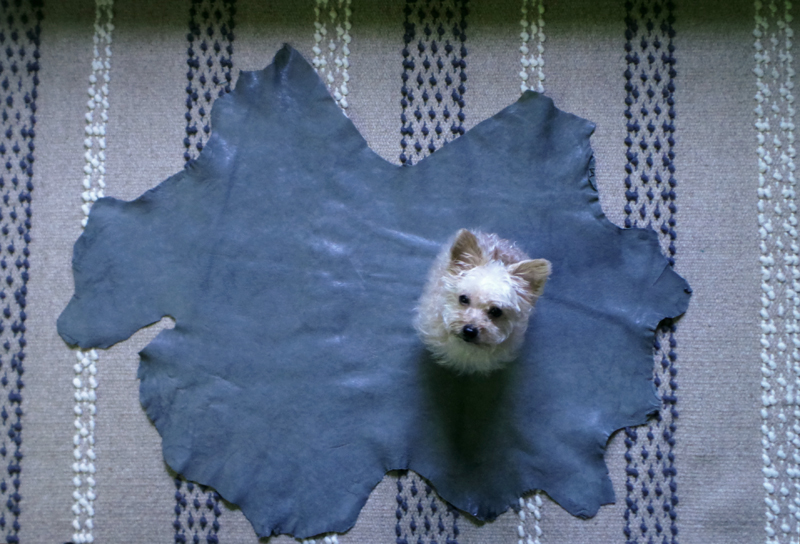
Unlike fabric, which is usually sold by the yard, leather is generally priced by piece. Since my project required very little leather, I chose a lovely gray goatskin that would work well with other future projects. Maybe we can make some boots for Wonka? :)


I printed and cut the pattern for my cover (You can find the template that I used here). After examining and selecting a section that laid nice and flat, I then carefully traced an outline of the pattern onto the skin. A scratch awl would've been ideal for this job, but an embossing needle worked out just fine.


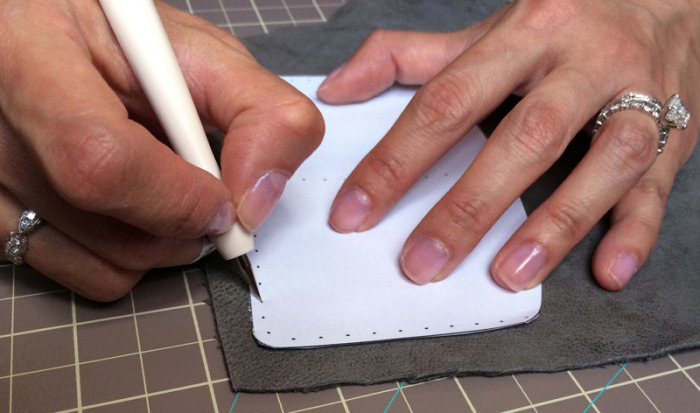
After tracing out the pattern, I went ahead and started puncturing holes along the dotted border of the template. It was important to be as precise as possible because leather is pretty unforgiving - once you poke a hole, it's there to stay. It helps to have a craft cutting board or even a stack of newspapers underneath as you work. This allows you to pierce deeper into the leather without damaging your work surface.


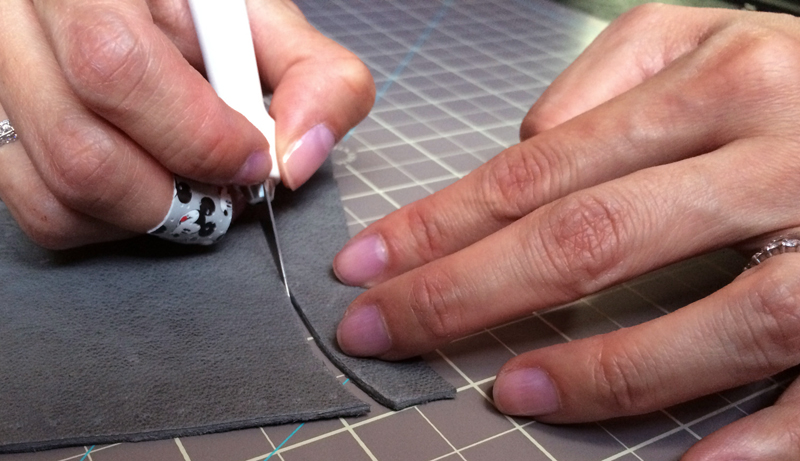
This is the part where I sliced my finger open, bled over all my work, and had to start over. PLEASE be careful as you cut!! Different sections of a pelt can vary in thickness and softness, so cut slowly and keep your hands steady so you don't end up wearing a Mickey Mouse midi ring. A ruler is also helpful for guiding your lines and creating a clean cut.


Time to sew! I used a heavy-duty poly thread that I had laying around, but waxed linen thread would give these stitches a nice, bold look. This template calls for
aproximately 45" of thread for each side of the cover, and 20" for the card divider line.


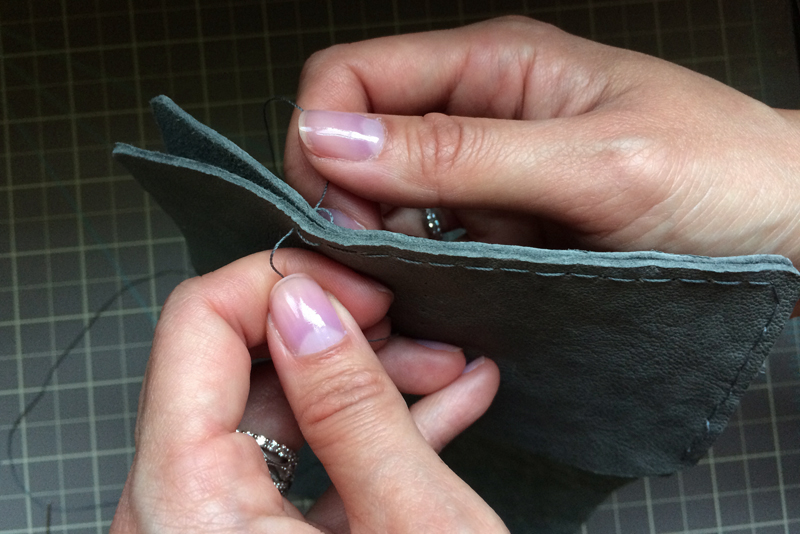
Saddle stitching is a common technique used in leatherworking, and I picked it up pretty quickly from this very short and straightforward video tutorial. The key to neat saddle stitching is to keep pulling both ends taught, so that the lengths are equal on both sides, in order to set each stich before moving on to the next hole. I used this technique to stitch both sides of the cover, then sewed in the card holder divider.


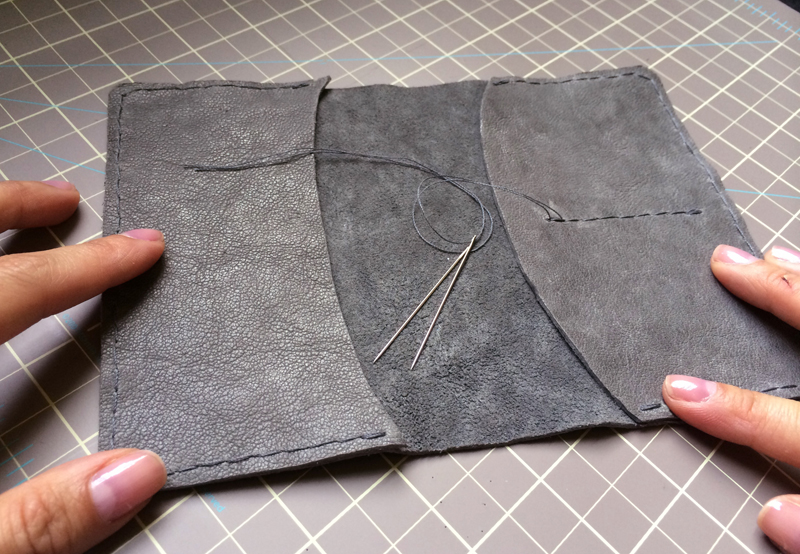
Now the cover is complete, and it's time to find a new adventure :) See you guys later!

Thursday
Apr242014

High Five

With our five-year wedding anniversary peeking around the corner, I thought it would be fun to take a quick stroll down memory lane today!

Our engagement video (created by my lovely and tremendously talented sister-in-law, Nina) is a gift that I love revisiting time and again. Not only does it capture the joy and hope surrounding the anticipation of our marriage, it is also a testimony of how far we have all come in these past few years.

Chris and I are extremely blessed to have friends and family who constantly encourage us to grow happier, healthier, and closer together than ever before. We are so thankful for you guys, and we are looking forward to sharing many more wonderful memories with you.

Thursday
Feb202014

Just My Cup of Tea

Chris and I have been drinking lots and lots of tea throughout this snowy winter. We’ve done quite a bit of exploring lately and have been learning about the flavors, effects, and benefits unique to each plant. It has become a nightly ritual to share a pot before bed, usually over an episode or two of House of Cards. There is nothing more comforting than snuggling up with a warm cup of tea on a chilly evening!

When it came time to brainstorm my annual Valentine's dessert, I knew I wanted to incorporate our newfound penchant for tea into a delicious treat. I decided to take a classic panna cotta and infuse it with the delicate flavor of Earl Grey tea. Topped with a blackberry compote, each spoonful was a silky bite of rich, creamy goodness mixed with a juicy pop of sweetness. I am kind of hooked, and will be making more this weekend.

If you'd like to try this simple and delicious treat, you will need:

2 cups whole milk
2 cups heavy cream
1/4 cup turbinado sugar
1/3 cup tea of your choice
1 packet of unflavored gelatin
(For compote)
1 pint organic blackberries
3 tablespoons turbinado sugar
1 half lemon

I chose basic Earl Grey tea because its deep flavor pairs well with milkiness of the dessert. You can really go to town experimenting with different teas. I cannot wait to try this recipe with chai, matcha, and floral blends.

If you are using loose tea leaves, you can steep the leaves directly in the cream mixture, and drain with a sieve. I opted to use cotton sachets, which are much easier for cleanup. Note - It may be necessary to tweak the amount of tea and steeping time, based on the type of tea you are working with and boldness of flavor you desire.

Combine the milk, cream, and sugar together in a medium saucepan. Stir over medium heat until the mixture starts steaming - do not allow to come to a boil. Remove from heat and whisk gelatin into the mixture until dissolved. Add tea and steep for 3-5 minutes.

Remove and discard tea leaves, and ladle the flavored cream into individual bowls or ramekins. Teacups also make the perfect serving vessels! Cover with saran wrap before refrigerating to avoid developing yucky gelatin skin. Chill overnight before enjoying.

Blackberry compote is super easy to make, and it lends a tart sweetness to compliment the smokiness of Earl Grey tea. I strongly advise using organic blackberries because berries are considered "dirty" produce. Simply simmer 3 tbsp water, berries, sugar, and a squirt of lemon juice over low heat until the mixture reduces to a syrupy consistency and the berries become soft and juicy. Allow to cool, and drizzle (or, in my case, pour) over your dessert before serving.

Indulge with good company, or over a wonderful book! And hang in there - Spring is right around the corner :)

Page 1 ... 3 4 5 6 7 ... 35 Next 3 Entries »